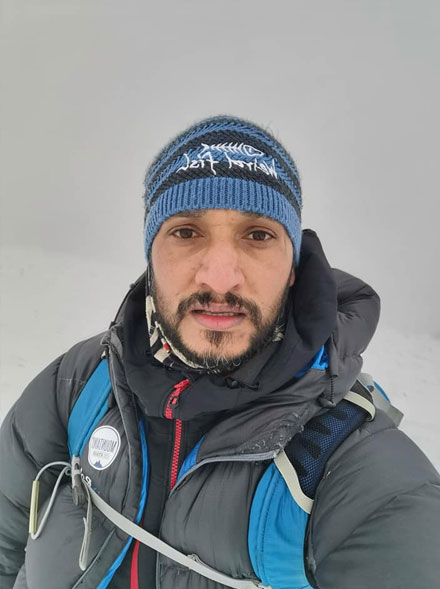
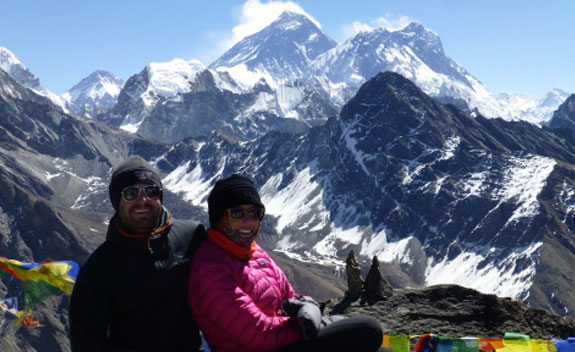
We did the Everest Base Camp via Gokyo Lakes trek with Himalayan Glacier. The mountain scenery was spectacular! Because we opted for an all-inclusive package, we have only limited info/knowledge regarding matters like air tickets to/from Lukla, hiring guides and porters, arranging permits, selecting accommodation, etc. We will talk about what trek we did and why, and we will share any insights gained. This post will be an overview and is heavy on the practical info. We will cover the segments in other posts with more photos.

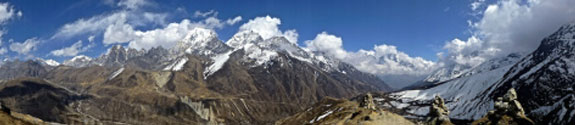
Our Trekking Route
We flew from Kathmandu to Lukla on Friday, April 4. We were scheduled to fly on April 3, but after waiting several hours at the airport, we were told to go home. Flights in and out of Lukla are frequently canceled due to weather/wind.
April 4: After landing in Lukla (9,315’) we hiked to Phakding (8,560’).
April 5: Hike to Namche Bazaar (11,300’).
April 6: Acclimatization day in Namche Bazaar. This became a notorious day as many believed it was a “rest” day, but it was a full day of trekking.
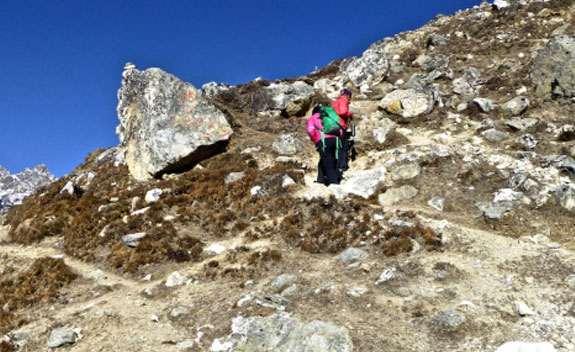
April 7: Hike to Dhole (13,480’). This is the day we split from the main EBC trail to head up the Gokyo Valley.
April 8: Hike to Macchermo (14,660’).
April 9: Hike to Gokyo (15,740’).
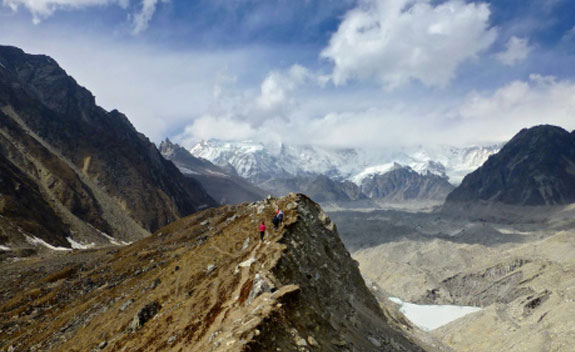
April 10: Hike up and down Gokyo Ri (17,575’) then to Thangnag (15,420’). Note that we skipped a “rest” day in Gokyo on account of missing our April 3 flight.
April 11: Cross the Cho La Pass (17,610’) to Dzongla (15,840’).
April 12: Hike to Lobuche (16,170’). This is where we rejoined the main EBC trail.
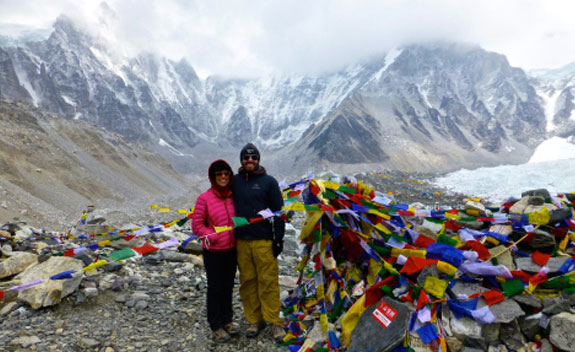
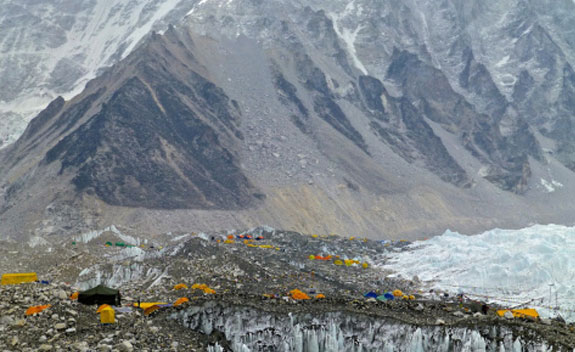
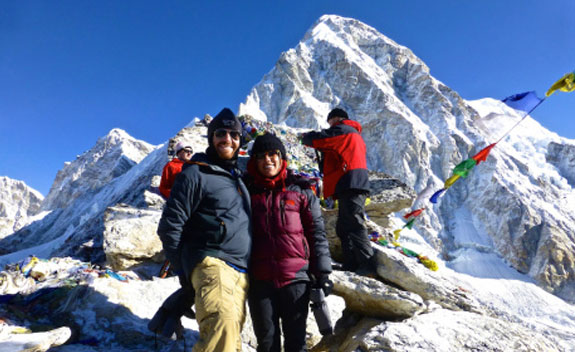
April 13: Hike to Gorak Shep (16,920’) then EBC (17,600’) and back to Gorak Shep.
April 14: Hike up Kala Patthar (18,200’) then down to Pheriche (14,000’).
April 15: Hike to Namche Bazaar (11,300’).
April 16: Helicopter from Namche Bazaar to Kathmandu. We planned to hike back to Lukla and fly out the next day, but someone on another trek with the same operator was sick and hired a helicopter, so we got a free lift.

Why We Chose This Trek
We were deciding between this trek or the Annapurna Circuit, i.e., the two most famous. We did limited research and by no means are we expert on the Nepal trekking options. We had read there is now road access for part of the Annapurna Circuit, and that put us off a bit. We pretty much chose the EBC area for its concentration of jaw-dropping gigantic mountains.
I believe the Annapurna Circuit covers a more diverse range of climates and elevations. Pokhara is the gateway to Annapurna, and we are told it is a beautiful place and certainly flights to Pokhara are much less susceptible to weather issues.

My father had done the EBC trek (with a little side excursion to Chukkhung) a few years ago and loved it (aside from the cold and general lack of comfort). Once we settled on the EBC area, we still had several options. We considered the Three Passes route but decided that was a little too ambitious. I have hiked some 14’ers in the US and crossed a 16k foot pass in Peru, but Jenni had never been higher than 11k feet (i.e., the top of a US ski mountain). So not knowing how she’d respond to the altitude we didn’t want to commit to three passes, but we also wanted to get somewhat off the beaten path and enjoy more of the scenery. And while crossing Cho La Pass was by far the most difficult day, we were very pleased with the trek we chose and would highly recommend the Gokyo Lakes route to those up for the challenge.

By trekking up the Gokyo Valley, we escaped some of the crowds on the main EBC trail for a while. We enjoyed the outstanding scenery and smaller tea houses. We saw a few Himalayan tahrs (relatives of wild mountain goats), which we did not see on the main EBC trail. And, as a huge plus, the overwhelming majority of our trek was a loop rather than out and back.
We met a Swiss group, and one among them visits Nepal often. I asked his favorite trek, and he said probably the Dhaulagiri Circuit. It is near Annapurna, and I believe quite difficult. There are many different regions to trek in Nepal, and some are more remote. Our goal was to see a lot of the really big mountains from proximity, and that is why we chose EBC.
When To Go
The true peak season for EBC is around October-November. The air is clearest after the summer rains. The second peak is when we went, around mid-March to mid-May. I think very few treks during the summer monsoon months (think rain, mud, and leeches), and you can trek through the winter but it may be freezing, and some passes may be dangerous.
It seems that our April trek offered some advantages and some disadvantages. It was not as crowded as the fall, we generally had very good weather, and I imagine there is more snow around. The rhododendrons were in bloom, which was nice, though I think these may be more impressive on the Annapurna Circuit. We also saw many people on their way to climbing Everest, and the tents were all set up at EBC. I don’t think there are any tents at EBC in the fall and nobody climbs the mountain at that time of year.
That said, all the lakes were frozen. So if you Google “Gokyo Lakes” and see brilliant turquoise water, you may be disappointed to see only snow and ice on arrival. I think the landscape, in general, would be more green in the fall, and surely the rivers would rage much more impressively. The air in Kathmandu was very hazy for us, and I think it (and views on the flights) is clearer in the fall.
Tour Operator
We chose Himalayan Glacier. I had come across the company in an NY Times article. Overall, we were very pleased and happy to recommend this company to others. Our guide, Rishi, was great.
There are countless operators, both based abroad and in Nepal. When selecting an operator, you might consider things like how long they’ve been doing this, how they treat their guides and porters, what is included vs. extra, etc. One of the selling points for us was Himalayan Glacier’s willingness to ensure a private trip for the two of us. Although we spent most of our time together with other tourists and guides from the same company, Jenni and I had our guide, and we had the flexibility to adjust our speed or plans if necessary.
Independent vs. Guided
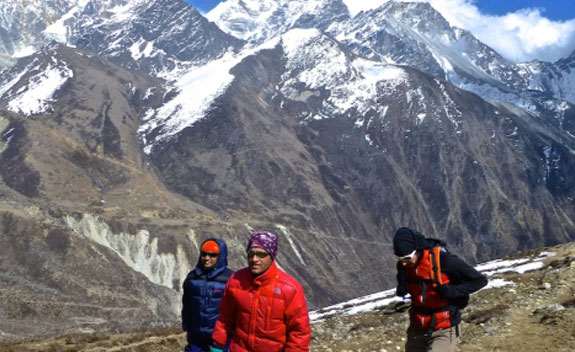
We saw plenty of people trekking without a guide and carrying their own large packs. I’m sure you can save money this way and can imagine one might have an even greater sense of accomplishment. Especially if you are sticking to the main EBC trail, it would be fairly easy to find your way. When you add the high pass and glacier crossing, it would be a little harder to navigate on your own, though certainly doable. That said, we never considered going independent and probably never would.

A day pack alone weighs a fair amount if you are adequately prepared and carry a lot of water. Having a porter carry the rest of your belongings makes the trek more enjoyable and helps support the local economy. Our guide was extremely attentive and answered questions about the Himalayan way of life, which mountains we were viewing, etc. We never had to decide where to stay or how far to push each day. And we learned a fun card game called dhumbal.
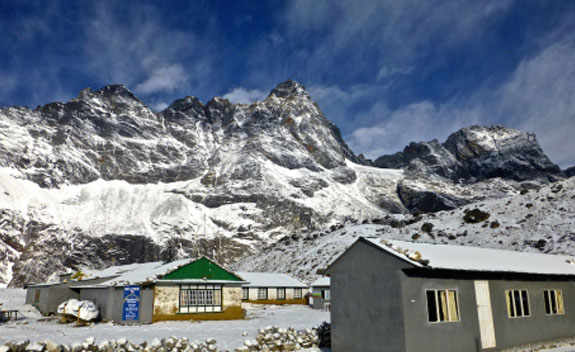
Accommodation
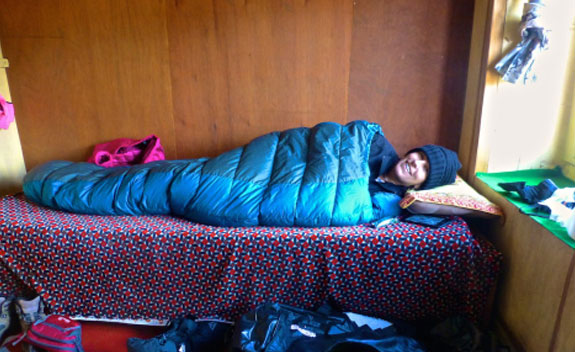
Ample tea houses are covering the entire route. At lower elevations, the villages tend to be larger and have a more permanent population. At higher elevations, the villages are smaller and may have no year-round residents. Rather the tea houses are owned and/or operated seasonally by people who live down the mountain or even in Kathmandu.
Everywhere we stayed was basic, but there were some significant variations in comfort level. We always had a private bedroom. In Phakding and Namche Bazaar we had a private bathroom, and the latter even had a hot water shower. Everywhere else, the toilets were shared and generally consisted of a porcelain hole in the ground. Some places had western style toilets but with no seat and no flushing mechanism (aside from a jug of water to pour). We descended quickly on the EBC main trail and thus did not sample as many villages there, but I think you may retain some amenities beyond Namche Bazaar (e.g., in Tengboche and Pangboche, etc.) vs. what we found in the Gokyo Valley.
There are some places that are more expensive and said to be more luxurious. These include the Hotel Everest View (we stopped here on our acclimatization day above Namche Bazaar, and the views are wonderful) and some Yeti Mountain Home properties. What exactly these provide I don’t know, but I’m not sure the value for your money would be there (e.g., some of the tea houses we stayed in cost the equivalent of $2 a night, versus $200 I’m told for some of these “luxury” places, but I don’t think they are luxury in the typical, non-Himalayan sense).
Food
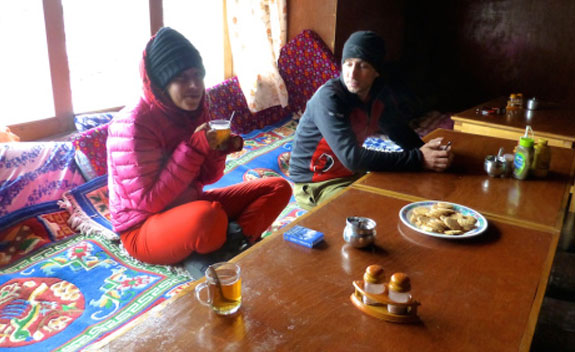
Although dal bhat (literally lentils and rice) is legendary in these parts and perhaps once was the only option available to trekkers, you will have many other options at the tea houses. Breakfast choices usually include eggs, toast, porridge, pancakes, Tibetan bread (i.e., fried dough, yummy), etc. Lunch and dinner choices include fried noodles, fried rice, chicken or buffalo dishes, soups, popcorn, french fries, etc. Cheese may be limited to nak (female yak) cheese, which we found OK but some dislike it. It’s a bit pungent. Coffee is available, and tea (in many flavors) is ubiquitous.
Our guide advised us that it is wise to avoid meat and milk above Namche Bazaar. Apparently, they do not slaughter animals in the mountains, and there is minimal freezing/refrigeration (aside from the cold temperatures, but it can be sunny and warmer during the day), so if you order meat up high then it may be many days old. That said, we saw some pretty experienced folks eating spaghetti bolognese in Lobuche. We also had fellow trekkers suffer stomach illness as early as Namche.
It is a good idea to bring along snacks, although we were well-fed and rarely needed these. Salt is your friend when sweating a lot. Nuts, granola bars, Snickers, etc.
How We Trained
We did not. I went back and forth between telling myself I trained not at all or that I’ve been training for the last eight years. We have been traveling for months, and that entails moving around a lot, so it is not as though we stood up from our desks and embarked on the trek. Had we come from home, I am sure we would have been exercising a lot and hiking locally and probably doing sets on the Santa Monica stairs. Instead, after Jenni got sick in Borneo, we scrapped some hikes we had planned there and in the Philippines.
The best advice I can give is to assess yourself honestly. If you are reasonably active and fit, I do not think you need to train at all. You cannot really prepare for the altitude, and that is the biggest wildcard. We felt that training would not have made much difference for us, except that our legs probably would not have been sore at all vs. being sore on a couple of the days.
The most important thing is having comfortable footwear that you can walk in for several miles day after day. And good balance is helpful. There is often awkward footing and some rock-hopping, some of it across water or ice and much of it on wobblers, and good balance will reduce your chance of injury.
Packing List
Because we had been traveling around the tropics before arriving in Nepal, we brought less than we would have if coming straight from home. I think this was a blessing. This will be a detailed list of what each of us brought.
Buying Supplies Locally: The main tourist area of Thamel in Kathmandu is loaded with shops selling trekking and mountaineering gear. Most of it is fake, and most shops do not pretend otherwise. There seem to be some shops selling legitimate gear that is priced as you would find it in the US, if not more expensive. Generally speaking, it is easy and cheap to buy fake fleece, down, hats, trekking poles, pack covers, etc. We bought a handful of genuine fakes and what seemed to be a real Camel-Bak reservoir and socks since we did not want liquid leaking all over our things and good socks are critical. Note that the advertised sizes on the fake backpacks we saw were grossly inflated, i.e. if you actually want a 30L backpack you should probably buy one that says it’s 50L.
Himalayan Glacier loaned us (included in the trek price) sleeping bags and big puffy down jackets.
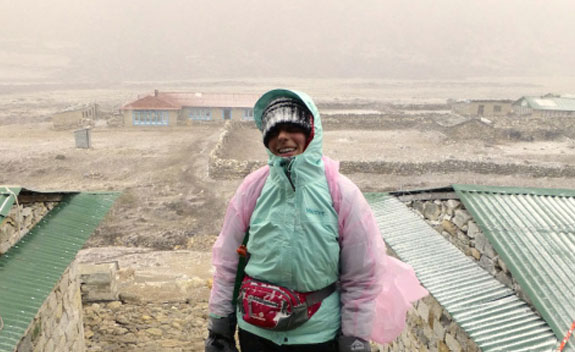
Bags: Himalayan Glacier provided us with waterproof duffel bags that the porters carried, and it was delightful to have so much extra space in these bags such that packing each day on the trek was the easiest it has been our whole trip. I used the 35L Gregory daypack I’ve had for years, and Jenni used the 18L REI lightweight pack we bought for the broader trip. This was quite small and meant she could not fit many layers in it, nor carry much water. So Alan wound up carrying the water for both of Jenni and us supplemented the small backpack with a fanny pack. That’s right; she’ll be rocking the fanny pack in some or all of the photos. For your viewing pleasure folks. (P.S. Don’t knock it till you try it. That thing comes in handy in the Himalayas!).
Shared Miscellaneous Items:
- Water purification (Aqua Mira drops plus Katadyn Micropur tablets, note the amount of time required to purify)
- Water bottles (local and cheap) and Camel-Bak 3L reservoir
- Flavor powder for purified water (local and cheap, we bought 2 packs and had plenty of extras)
- Extra zip-loc bags
- Earplugs!!! (The tea house walls are like paper, you can literally hear your neighbor breathing, so unless you are the world’s deepest sleeper, you will want these basically every night)
- Compass
- Leatherman knife
- Emergency whistle
- Headlamps with extra batteries
- Padlocks for duffel (local, ~$2)
- Snacks (Snickers, chocolate, granola bars, etc.)
- Neck Pillow (the kind you bring on airplanes. Jenni brought this not knowing if there’d be pillows at the tea houses, and there always were so she actually never used it. Sorry Sange!)
Technology/Entertainment:
- Camera with extra memory card plus cleaning pen and mini-tripod
- We each brought a Kindle (+ charger) and iPhone (+ charger). It was so cold, and I didn’t want to bother paying to charge it, so I barely ended up using my Kindle, but Alan used him fairly often. If coming from the home, I’d probably have brought real, paper books. Charging is available at most teahouses for an hourly fee, but it’s not super consistent because much of the power as you reach higher elevations is solar and you can’t always count on the sun shining.
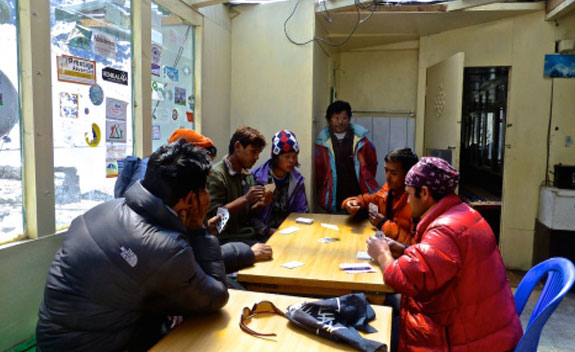
- Cards (I bought a pack of cards on the way up, and they got very good mileage in the couple weeks we were up there. Pick your own means of entertainment, but cards are an excellent way to pass the time in the cold tea houses. I saw a few other groups with Uno sets and I have to admit, I was pretty jealous).
Toiletries:
- Toothbrush
- Toothpaste
- Floss
- Contact lenses with spares
- Lens solution
- Glasses
- Sunglasses
- Deodorant
- Baby powder
- Soap (Sea to Summit Wilderness Wash)
- Hand sanitizer
- Tissues (those little packs are great for carrying as you trek) and lots of toilet paper (not provided anywhere on the mountain!)
- Sunblock (for what little of your skin is actually exposed)
- Chapstick with SPF
- Hair ties and headbands
- Quick-dry lightweight towels (local, ~$5)
- Baby wipes (I’d read these come in really handy since you aren’t showering, but honestly it was so cold we didn’t even really use these. You just come to terms with your trekking filth)
- Pee-tool (I think I was still too embarrassed even to admit owning this when I initially posted a packing list, but well…if a blog is not for over-sharing, then what is it for, eh? I bought a pee tool off Amazon because I used not to know how to pee standing up. There, I said it. This is basically an ergonomically designed funnel that allows me to pee like a man. Without removing my pants. It’s come in immensely helpful on various hiking and backpacking trips. It also was extremely clutch in India on a long drive with no toilet access. But I am very proud to say that throughout four months in Southeast Asia, I learned how to squat pee. Anyone who knew me in college and ever attended an outdoor function with limited toilets has probably seen me hide between cars as my pants are fully removed and thrown over the top of one. Well, I’m a big girl now. And I trekked for two weeks in the Himalayas without using my pee tool. Go me.)
Medical:
- Diamox (altitude medication). We started taking this as early as Namche. A lot of people held out until later, but most people we met used it at least for some portion of their trek. I think it definitely helps. Jenni wound up feeling (mostly minor) effects from the altitude every day from Namche until she was back to Namche (that’s nine days of headaches, in case anyone was counting).
- Other more customary medication like birth control, Advil, Immodium, etc.
- Moleskin, bandaids, athletic tape
Alan’s Clothing:
- Boxer briefs (5 pairs)
- Hiking socks (3 pairs) and liners (1 pair)
- Hiking shoes. I hiked in Garmont gore-tex shoes that are sturdy but low-cut. I have done most big hikes in shoes rather than boots, and these worked fine on the trek. If you are carrying your own pack, you would more likely care about proper hiking boots. And my feet were a little cold at times, but I would probably wear the same shoes again.
- Tops: mid-weight SmartWool zip-neck long underwear top (1); quick-dry shirts (2 short sleeve and 1 long sleeve); Patagonia fleece top (1); Arc’Teryx Atom LT Hoody (1); rain jacket; lightweight fleece top (local, ~$10 with bottom, and used for evenings); loaner down jacket used for early morning starts and some cold evenings
- Bottoms: lightweight long underwear bottoms (1 pair); zip-off trekking pants (1 pair); rain pants; lightweight fleece bottom (local, ~$10 with top, and used for evenings); heavy REI fleece pants
- Accessories: balaclava; winter hat (actually had 1 for day and 1 for night); under gloves; down mittens (bought locally for ~$5); down booties (local, ~$5); collapsible trekking poles; bandana (mainly as Kindle cover); daypack rain cover (local, ~$2)
Jenni’s Clothing:
- Underwear (let’s start off getting real, shall we? I packed probably 14 pairs. I used 3. It’s far too cold to remove your pants up there. Don’t judge me til you’ve trekked at this altitude!)
- Panty liners (so, if you’re not changing your undies, changing a panty liner each day is the next best thing)
- Bras: 2 sports bras, one sleeping bra (I used this at lower elevations, but again you stop changing as it gets higher and colder)
- Hiking socks (3 pairs) and liners (1 pair)
- Hiking boots!
- Tops: quick dry short-sleeve t-shirts (2 but 1 would have probably sufficed); quick dry long-sleeve shirt (1); cotton/polyester long-sleeve hooded shirt (this came in so clutch because I used it to cover my face and head when it was cold but not bad enough to pull out the balaclava. I wore it almost every day as my second layer, over a short or long sleeve quick dry top); double thick fleece jacket (bought locally for ~$9); Patagonia down jacket; big puffy down jacket loaned by Himalayan Glacier (used this when we left before the sun was up, to start Cho La Pass and Kala Patthar, otherwise got limited use out of it)
- Bottoms: running pants (used as my base layer every day after Gokyo); hiking pants (these were great on their own up until Gokyo, then I supplemented them with the running pants and fleece pants underneath and didn’t take off any of those three layers for the next week)
- Long Underwear: lightweight fleece top and bottom (local, ~$10, generally used the top for evenings and as an extra layer when it was really cold. I used the fleece as part of my pants trifecta); second pair of fleece pants (used for sleeping and packed in my daypack for really cold days to fit over my other 3 pairs of pants and under my rain pants – only used once for that purpose)
- Wet weather gear: rain pants and rain jacket (kept these in my daypack every day and used when it snowed); poncho (used one day when it snowed hard, worked fabulously as a pack cover if not the least stylish outfit of all times)
- Accessories: under gloves; down mittens (bought locally for ~$5); balaclava, winter hat; down booties (local, ~$5)
Other items we wished we had: Jenni would have killed for some clean clothes after her shower in Namche (the only things that weren’t dirty by that point were those millions of untouched pairs of undies). She also regretted her decision to forego the hairbrush. Had Alan come straight from home, he would have brought his gore-tex shell jacket and perhaps pants (both of which I ski in), probably gaiters, heavier leather hiking boots, and heavier socks. I managed fine without any of this. Flip-flops or Crocs would be nice for using toilets while not trekking. We could not wear our down booties on the wet surfaces and putting on your hiking shoes/boots isn’t ideal, but it’s not so bad. And we saw others using those Starbucks Via instant coffee packets, which might be a nice touch if you’re pickier about your morning coffee.